Understanding the Process of Fibreglass Pond Lining
Fibreglass pond lining can seem complicated at first, with resin, layers, and curing time, it is a lot. But step by step, it becomes manageable. More importantly, these liners can last for 2-3 decades if maintained well, which what all pond owners want.
In Suffolk, most homeowners choose That Pond Guy for permanent solutions. They are the best Suffolk pond fibreglassing services. Instead of dealing with recurring leaks or ageing liners, pond owners prefer something durable that lasts. And honestly, that shift makes a noticeable difference over time.
Why Fibreglass Lining Is So Popular
Before getting into the process, it helps to understand the appeal.
- Creates a seamless, watertight surface
- Extremely durable and long-lasting
- Smooth finish reduces algae buildup
- Works well with different pond shapes
Unlike traditional liners, fibreglass forms a rigid shell. No folds, no weak seams. Just a solid structure that holds up over time.
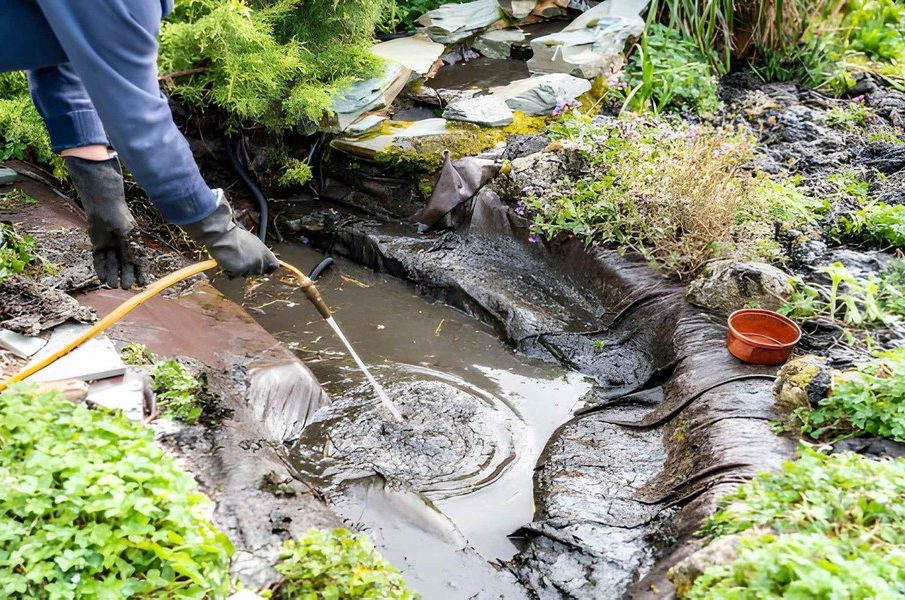
Step 1: Preparing the Pond Base
This step is easy to underestimate, but it is crucial:
- Drain the pond completely
- Remove old liners, dirt, debris
- Clean the surface thoroughly
- Repair cracks and uneven areas
The surface must be completely dry. Even slight moisture can affect bonding and cause problems later.
Step 2: Measuring and Planning
Once the base is ready, planning begins:
- Measure the pond carefully
- Cut the fibre-glass matting slightly larger
- Allow overlaps between sections
These overlaps help create a seamless, durable finish. It is a small detail, but it matters more than you think
Step 3: Applying Resin and Matting
This is where the real work begins, and yes, it can get messy.
- Apply a layer of resin evenly across the surface
- Lay the fibreglass mat onto the wet resin
- Press it down to remove air bubbles
- Add another coat of resin on top
The key is full saturation. Every part of the mat should be properly coated. Miss a spot, and it can turn into a weak point later.
Step 4: Building Up the Layers
Fibre-glassing is not just one layer and done. It is a process of building strength.
- Apply multiple layers of matting and resin
- Smooth each layer carefully
- Remove trapped air as you go
Over time, these layers form a thick, durable shell. Strong enough to handle pressure, weather, and regular use.
Step 5: Finishing Touches
Once the structure is complete, it is time to refine it.
- Trim excess fibreglass
- Sand rough or uneven areas
- Apply a protective gel coat
The gel coat gives that clean, polished look. It also adds protection against UV rays and general wear.
Step 6: Curing and Final Checks
Now comes the waiting part.
- Leave it to cure for 24-48 hours
- Keep the surface dry and undisturbed
- Check for bubbles or imperfections
Rushing this step can weaken the entire lining. Patience really pays off here.
Final Step: Filling the Pond
Final Thoughts
Fibreglass pond lining takes time and care, but delivers a strong, seamless finish. In the end, you get a reliable pond that works smoothly, without constant repairs or ongoing stress.Top of Form
Bottom of Form